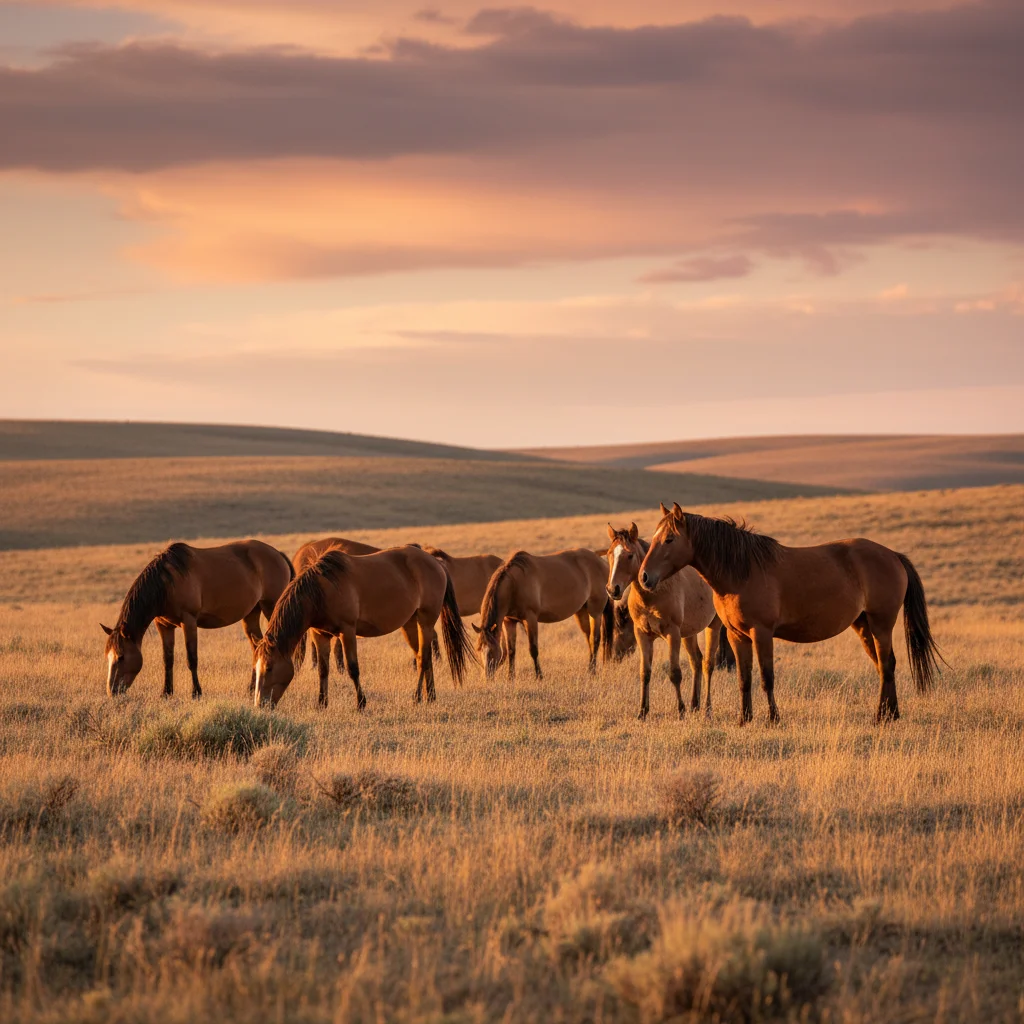
Your horse comes back from a winter workout soaking wet. Steam rises off that thick coat, and you know something has to change. During these cold months, riding gear and horse care naturally intersect. Just as riders look to top equestrian suppliers for breathable, weather-resistant jackets to stay warm in the saddle, we have to consider how our horses handle the same dropping temperatures. When they grow out that massive winter fluff, their natural insulation turns into a sweaty trap during exercise.
Clipping can feel like a lot at first. You look at all those blades, analyze the intricate patterns, and worry about the constant risk of ending up with a lopsided horse. But here is what most beginners rarely hear: horse body clipping is a practical skill that any dedicated owner can master. You just need the right guidance, a bit of patience, and the right environment. Much like sourcing durable winter riding coats from reliable equestrian clothing manufacturers, success comes down to choosing the right tools for the job and preparing yourself properly.
This guide covers the entire process from start to finish. You will learn how to choose between a trace clip and a full clip, how to get a nervous horse calm and ready, and exactly how to handle those notoriously tricky leg areas without losing your confidence or your horse's cooperation. By the time you finish reading, you will be completely ready to pick up those clippers yourself. Professional equestrians know that the foundation of a good winter riding season is a comfortable horse, paired of course with quality custom equestrian apparel from trusted vendors so the rider stays just as comfortable during long barn hours.
Why Clip Your Horse? (And When It's Worth Doing Yourself)
A thick winter coat is absolutely wonderful right up until your horse actually has to work in it. The honest truth is that that dense, cozy coat looks incredible in December when they are just standing in the paddock. But the very moment your horse breaks a solid sweat under the saddle, that beautiful winter fuzz becomes a real physical problem. Overheating, dehydration, drastically slower recovery times, and terrible skin trouble like rain scald or mud fever all share one root cause: the coat traps entirely too much heat and moisture right against the skin. Meanwhile, you might be perfectly layered in gear produced by a high-quality equestrian clothing factory, but your horse is struggling to regulate its core temperature.
The numbers completely back this up.
These are working animals whose owners decided the daily performance gains and recovery benefits were entirely worth the effort. Furthermore, owners time their grooming sessions to perfectly match clear natural signals such as the coat length, how much the horse sweats during a standard flatwork session, and exactly how long the drying process takes before they can be safely rugged and put away.
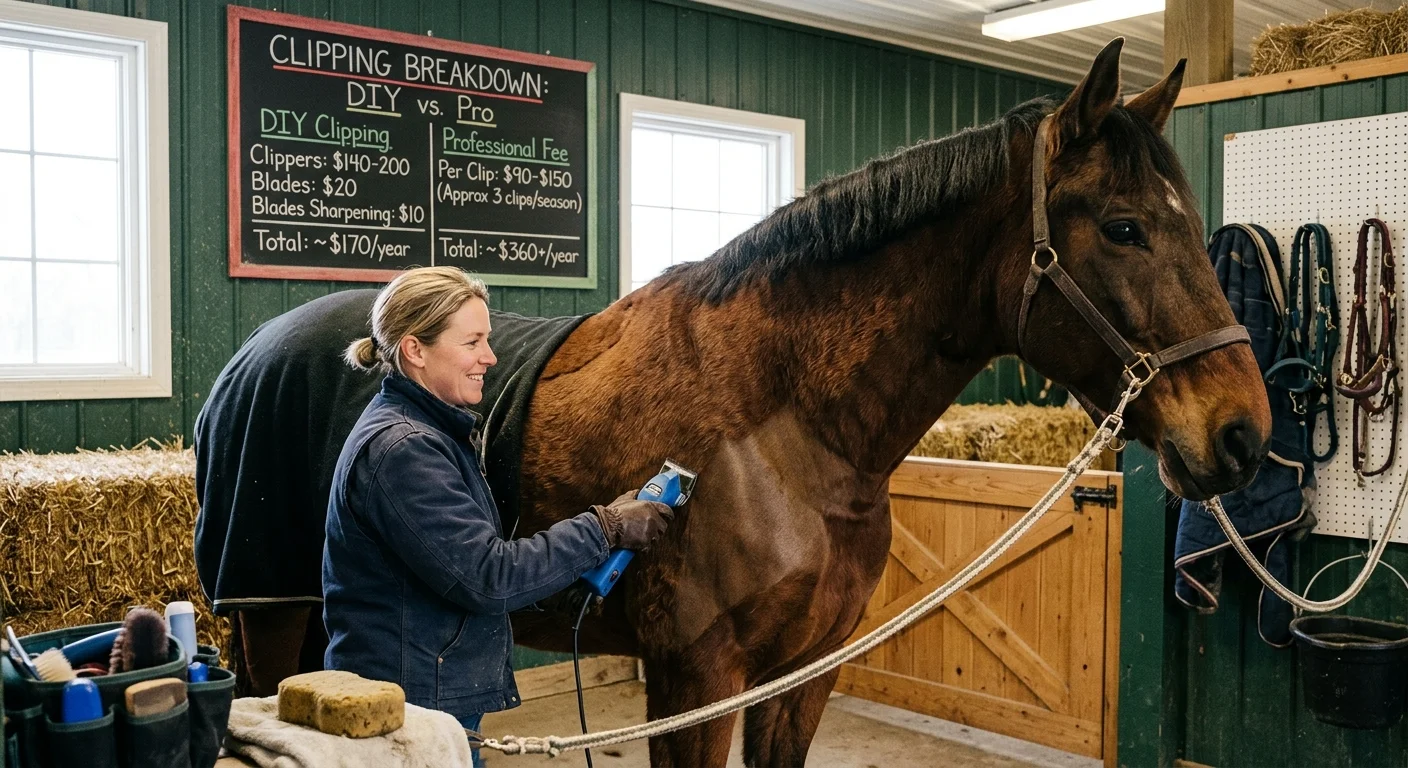
So, is taking the DIY clipping route actually worth your time? A professional clipping job currently runs anywhere from £50–150 per session depending on your location. For active horses requiring 2–4 clips per year depending on their workload and hair growth, that cost adds up incredibly fast over a single winter. With the right technique and a solid clipper investment, you can do it yourself, save a significant amount of money each season, and perhaps redirect those funds into updating your winter riding wardrobe with some gorgeous pieces from your favorite custom equestrian outfit provider.
Understanding the 4 Main Horse Clipping Patterns
When you break it down, there are really only four primary patterns you need to understand. Know these four, and the entire concept of horse clipping stops feeling like an unsolvable mystery. Your choices become clearer, and making a decision for your horse's specific lifestyle becomes immensely easier. Each pattern has its own distinct personality, its own functional purpose, and its own unique difficulty level. It is similar to selecting performance fabrics from equestrian outfit manufacturers—you have to pick the functional design that exactly matches the intensity of your daily work.
The Trace Clip is the perfect starting point for beginners, and there is absolutely no shame in utilizing it. In fact, about 70% of amateur winter clips are trace clips, and that number exists for a very solid reason. It specifically targets the areas where horses sweat the hardest, namely the neck, the chest, and the belly, leaving the back, hindquarters, and legs fully coated to ensure vital natural insulation stays intact. The Blanket Clip goes one logical step further than the trace. Imagine an exercise sheet or a blanket neatly draped across your horse's back; everything falling below that horizontal line gets completely clipped off. It is mostly straight lines, meaning it is clean, very straightforward, and incredibly forgiving to work with around the curved areas of the barrel.
The Hunter Clip sits comfortably in the middle ground and is highly favored by riders who frequent the trails or the hunt field. It works brilliantly for horses doing medium-to-hard work. Everything comes off except for the legs and a carefully measured patch shaped exactly like your saddle. That saddle patch stays unclipped to provide natural cushioning and stop painful rubbing under the tack, although leaving that patch neat and perfectly symmetrical requires a steady hand and a great deal of patience. Finally, the Full Clip is exactly what it sounds like. Every single bit of coat comes off the entire body, head, and legs. Professional show jumpers and dressage riders often use this clip to maintain that sleek, sharp show-ring finish. But be warned: horses with a full clip demand immediate heavy rugging, often requiring blankets with a 300g+ fill in chilling temperatures below 5°C. Managing a fully clipped horse requires strict dedication, much like caring for high-end custom equestrian clothing—both require meticulous daily attention to detail to remain in peak condition.
For your own sanity, follow a safe progression. Start with a trace clip to actively build your confidence without overwhelming the animal. Move to a blanket clip next season, then perhaps try the hunter. Hold off entirely on attempting the full clip until both you and your horse are completely accustomed to the vibration and noise of the machine. Building a remarkably calm, well-practiced partnership matters immensely more than achieving a flawless finish on your very first try.
Essential Tools for Beginner Horse Clipping
You can officially skip the intense feed store panic. There is no more need to stand frozen, staring at a giant wall of clippers, feeling utterly lost about what to buy. The honest truth is that you absolutely do not need to buy every single shiny accessory on the shelf. You just need a few of the correct things. When stocking up, many professionals recommend taking the same pragmatic approach you would when ordering bulk gear from wholesale equestrian clothing distributors: focus deeply on reliability, heavy-duty durability, and proven performance.
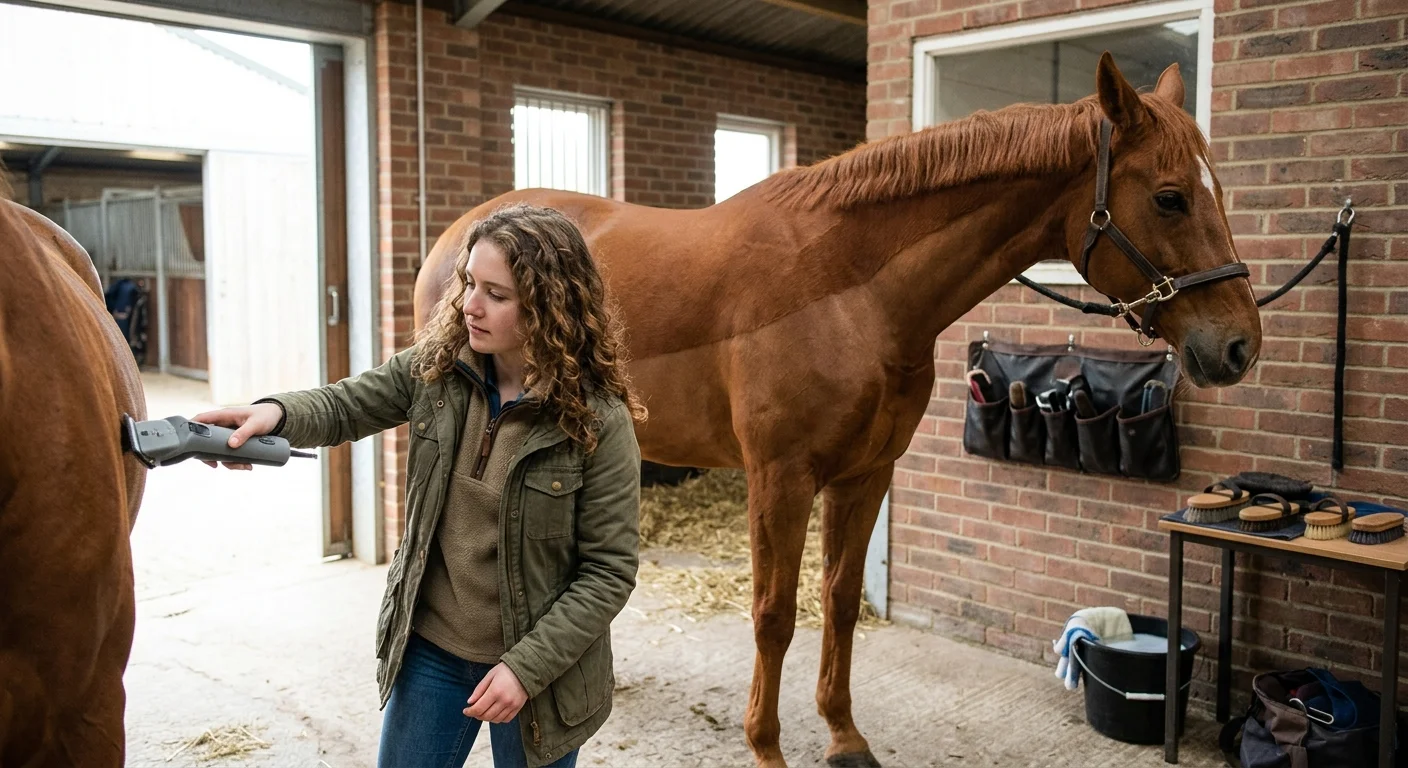
Start your kit with a dependable, corded body clipper. The Andis AGC Super 2-Speed is the one specific name that reliably comes up over and over again in beginner and professional circles alike, and for wonderful reason. It operates between 2,500 and 3,000 strokes per minute, generating more than enough torque and power to cut cleanly through incredibly thick winter coats without bogging down or stalling mid-stroke. Corded models simply give you unlimited, uninterrupted runtime. While the slight trade-off is needing a long extension cord to navigate around the horse, the reliable power output makes it well worth the hassle. For delicate face, ear, and muzzle work, be sure to grab a separate, much smaller detail trimmer. The Wahl Show Pro Plus, the battery-powered Wahl Super Pocket Pro, or the exceedingly quiet Liveryman Nova all do a remarkably clean job on highly sensitive spots. The low vibration of these small trimmers helps nervous horses settle significantly faster.
When it comes to purchasing blades, keep the math incredibly simple. You must buy at least two #10 blades. The #10 blade is your everyday workhorse, generally leaving about 1/16 of an inch of hair on the body and legs. Blades inevitably heat up very fast due to constant friction, so having the ability to swap a hot blade for a cool one mid-clip keeps the whole session moving safely and comfortably. Beyond the primary body blades, you might eventually want a #15 blade for neatening the bridle path, or a very fine #30 blade for detailed ear and muzzle work. Alongside your blades, your absolute non-negotiable kit must include premium blade oil to be applied every ten minutes, a cooling spray for quick mid-session temperature fixes, and spare blades because a dull blade will agonizingly tug at the hair and instantly break a horse's fragile trust.
If you genuinely want to talk numbers, budget roughly $200–400 for a solid starter clipper setup, adding about $50–100 per year for blade sharpening and oil specifically across four clips a season. Yes, it certainly is a notable upfront cost, but when you directly compare that to paying an independent groom £50–150 per session over the years, the financial math makes the best case for doing it yourself. And while you are saving money, you might even have enough left in the budget to finally look into that private label equestrian clothing brand you have been admiring for your winter layering.
How to Prepare Your Horse for Clipping (The Step Most Beginners Skip)
Preparation is exactly where most beginner clips go tragically wrong before the machine is even turned on. It makes complete sense; you have shiny new clippers, a seemingly willing horse, and every intention of just getting the daunting job done. So you dive straight in. But purposefully skipping the necessary prep work is exactly what quickly turns an otherwise clean clip into a highly patchy, blade-destroying mess. A dirty horse is simply a clipper blade's absolute worst enemy. Grime, dander, and dried mud instantly clog the fine metal teeth, severely dull out the sharp edge, and leave you with terrible, uneven lines that no amount of advanced technique can fix. Give your horse a thorough bath before you clip. If it is deeply freezing weather, a truly exhaustive, deep curry session must be done to lift out the surface grime.
There is one safety rule that is absolutely not negotiable under any circumstance: the coat must be bone dry before clippers touch it. Full stop. Running electrical clippers through damp hair is not only incredibly dangerous, but it guarantees a choppy, terrible outcome. Once the coat is completely dry, selectively spraying a very light coat polish over the hair helps the metal blades glide smoothly without painful drag, while also keeping nasty dirt from building back up mid-session. Preparing your horse is a lot like an equestrian clothing manufacturer preparing a new line of garments; the meticulous groundwork and fabric preparation directly dictate the high quality of the final result.
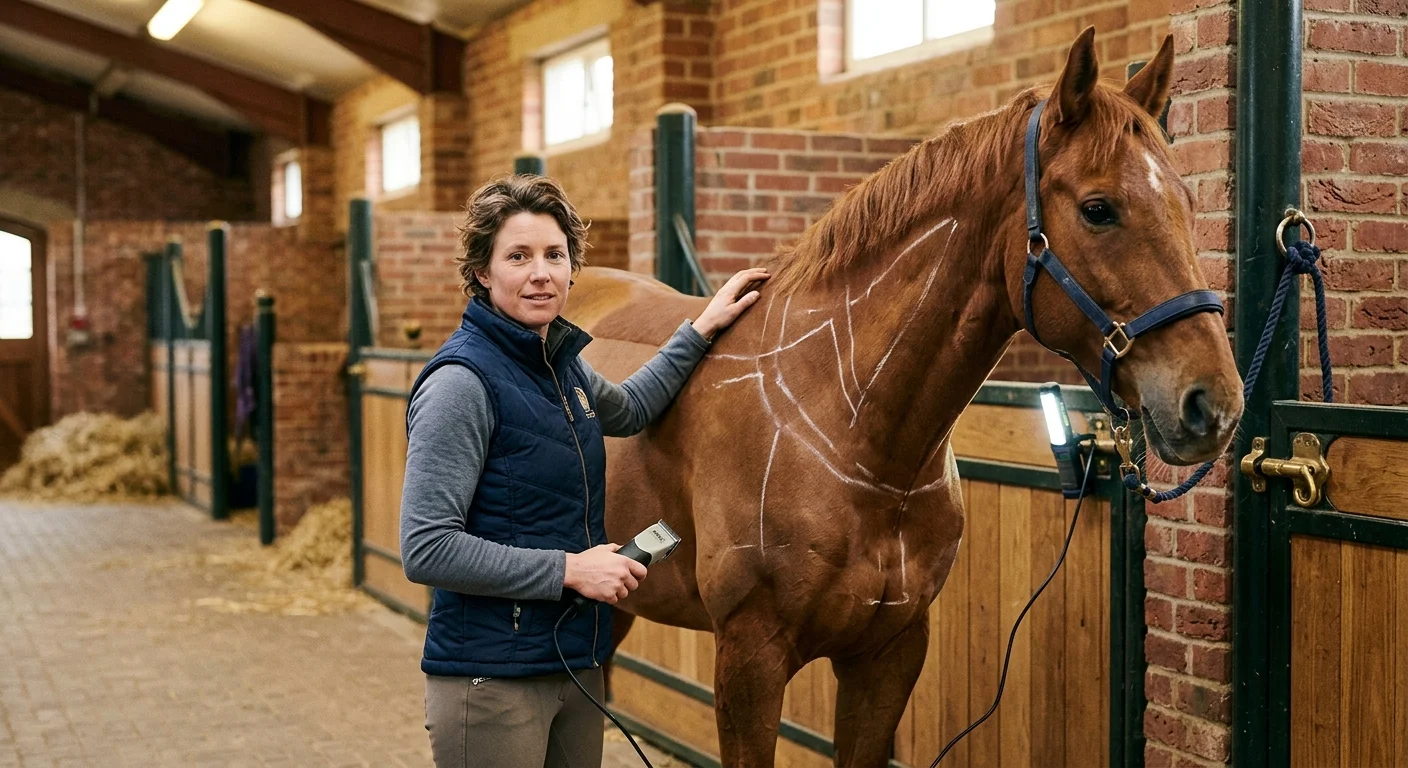
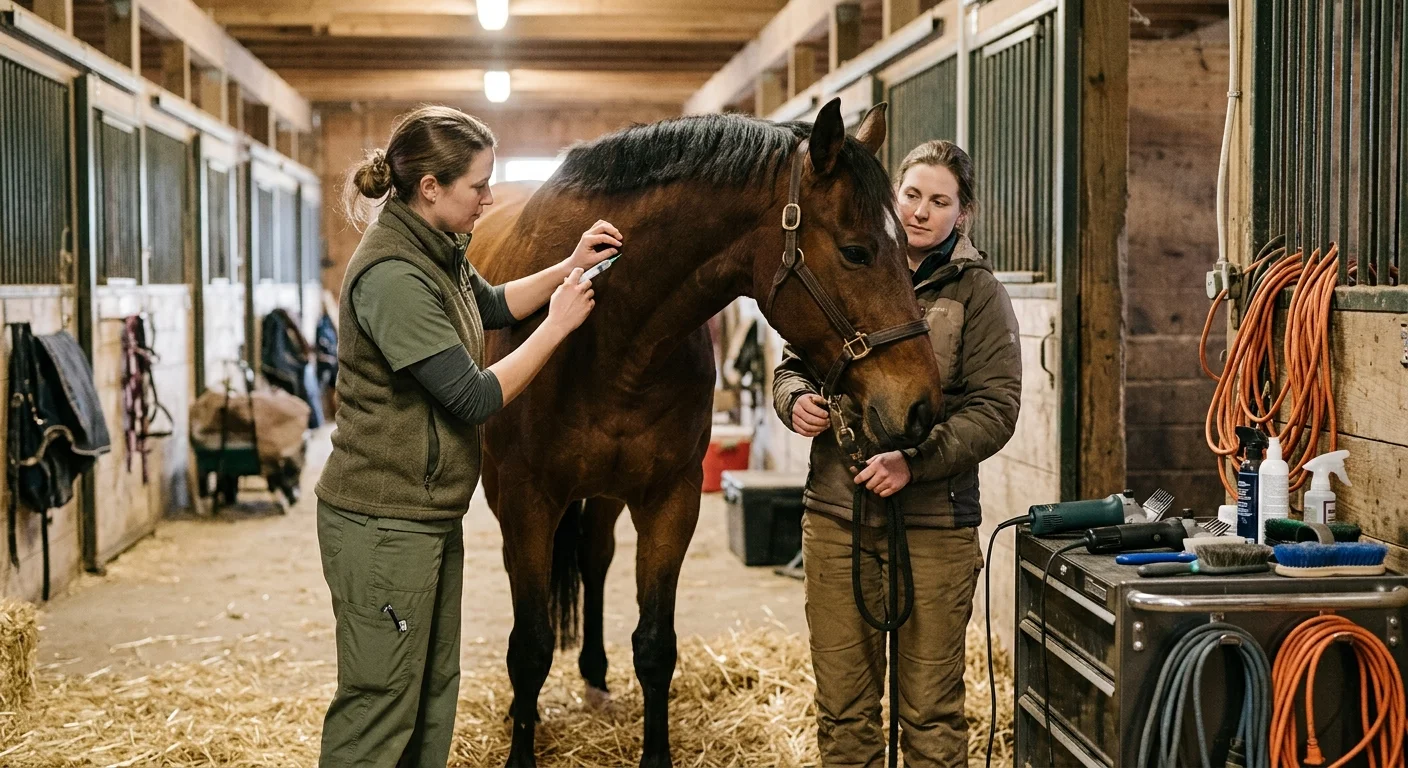
Marking your lines before you start is the crucial step that distinctly separates a tidy, professional-looking clip from a wild, messy guessing game. Use chalk or saddle soap to draw your clipping lines clearly on the coat before a single blade ever runs. Take a piece of string or a flexible measuring tape to precisely match the heights on both sides of the barrel. Complete the outline on one side, then carefully hold the string across the back and vividly copy that exact angle on the other. This visual mapping matters most for trace clips and blanket clips, as those specific patterns proudly show every single lopsided inch to the world. Before starting the motor, ensure you oil your blades thoroughly, pick a wonderfully quiet time at the barn when chaos is minimal, have treats heavily stocked, and never, ever clip a horse entirely alone. Preparation guarantees the actual labor becomes remarkably easy.
Step-by-Step Horse Clipping Guide for Beginners (Body to Face)
The precise order in which you actually clip the body matters almost as much as how you handle the machine itself. Getting the physical sequence right turns an anxiety-inducing chore into a wholly manageable, rhythmic process. Always begin at the soft, meaty shoulder or the thickest part of the neck. These happen to be your horse's largest, most forgiving muscle masses, and that is certainly not a coincidence. Thick muscle naturally absorbs the intense vibration of the motor, helping your horse stay completely calm as they acclimate to the strange buzzing sensation. By the time you finally reach the bonier, highly ticklish areas like the delicate belly or the sensitive legs, the buzzing clippers have thankfully become old news to them. Run your strokes against the direction of hair growth. This golden rule gives you a much closer, exceptionally cleaner cut and entirely removes those tell-tale track lines that plague beginners. Utilize long, smooth, confident strokes utilizing the full flowing stretch of your arm's reach while overlapping each subsequent pass by about twenty-five percent of the blade width to blend everything perfectly together.
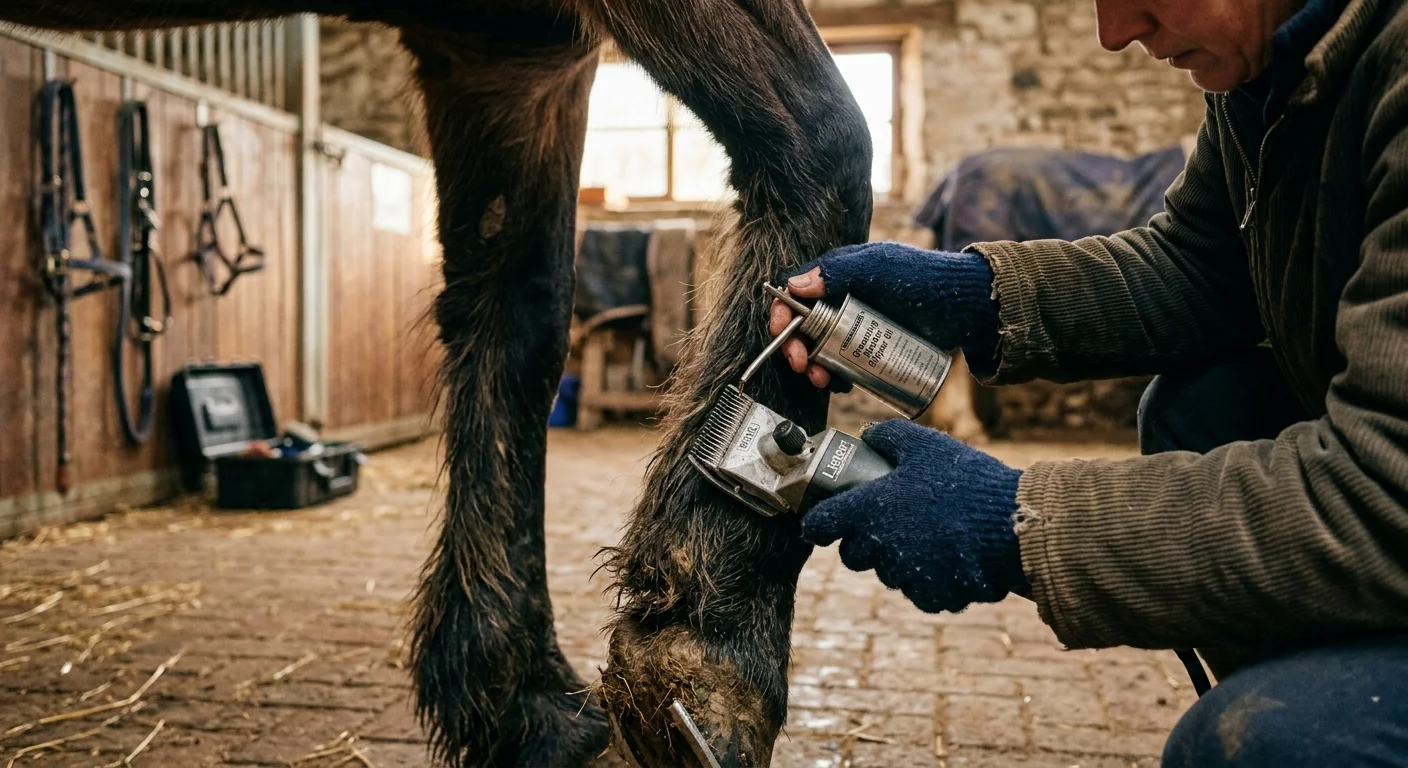
When you encounter the remarkably tricky, sensitive zones, they will demand your absolute full attention and physical dexterity. For the delicate armpits and the soft belly, you must use your free hand to aggressively stretch the loose skin completely taut right before the moving blade touches down. Soft, loose skin folds are precisely where dangerous nicks happen most often. At the tricky elbows, the broad chest, and the deep throatlatch, use your fingers to pull any natural wrinkles completely flat. As you transition to the notoriously sensitive hind legs and the reactive inner leg areas, consciously slow your pace down. Step back every few minutes to carefully brush the freshly clipped hair away so you can clearly see what you are doing, much like a tailor stepping back to evaluate the drape of a jacket when utilizing premium OEM/ODM services to perfect a brand new clothing design.
Tackling the highly sensitive face requires proceeding with extreme care, and deciding to leave the face entirely alone is a highly respectable choice for a beginner. The sheer risk of operating heavy machines near eyes and sensory whiskers is incredibly real. A tasteful half-head clip that safely keeps the upper face covered works wonderfully while your personal confidence safely grows. If you do attempt the chin and jaw, use very short, controlled strokes moving carefully against the grain, keeping the skin stretched firmly in any hidden crevices. For the soft nose, employ gentle passes while keeping a firm hand securely on your horse's halter to anticipate unexpected tosses. When managing the complicated ears, gently fold the ear cleanly in half and confidently clip from the outer tip down to the base in steady motions, never forcefully twisting the cartilage while holding the wide base to deaden the distracting vibration. And please remember: Never clip the sensory whiskers around the eyes or muzzle. Those coarse hairs are distinctively not cosmetic; they serve incredibly vital, practical sensory purposes for the animal.
Common Horse Clipping Mistakes (And How to Fix Them)
Here is an incredibly comforting truth: absolutely everyone who has ever picked up a buzzing set of clippers has embarrassingly made at least one of these exact mistakes. Learning to gracefully fix them is where your skills truly begin to shine, similar to how discerning brands carefully select an experienced equestrian clothing manufacturer to strictly correct minor manufacturing inconsistencies in their winter lines. If your clippers are agonizingly tugging, severely skipping, or miserably dragging through the plush coat instead of smoothly gliding, you are likely facing a filthy horse, terribly dull blades, or a dangerous overheated motor. This is precisely why it is commanded to clean your horse before you even plug in. A pristinely clean coat resolves half of your problems before they even occur.
Wavy, terrible lines and confusingly uneven depths naturally happen due to applying widely inconsistent physical pressure. Pushing entirely too hard in one specific spot and then too light in another leaves your beautiful horse looking rather like a faded topographical map. The easy fix is keeping a relaxed, perfectly steady hand and maintaining a rigidly constant blade angle throughout the entirety of each long pass. If nasty track marks and visible clipper lines stubbornly show up, specifically on lighter-colored grey or palomino horses, the primary fix is to simply re-clip in an X-pattern directly over the marred area. Gently lower your machine's motor speed and execute cross-directional passes to effectively blend the remaining hair. If faint lines are still visibly showing after an hour of blending, just leave it alone; wait two to three days, and the rapid natural regrowth will beautifully blend them right out of existence.
Preventing an overheating motor requires immense discipline; you must deliberately stop your work every 5 minutes to physically brush caked hair directly off the enclosed blade housing and generously add fresh oil. To actively prevent creating tragic nicks and bloody cuts on a sensitive animal, strictly start with a longer #7F blade as your initial safety test strip, then slowly move down to a sharper #9 or #10 for standard, neat body work. Never use anything finer than a ten on the body unless specifically directed by a medical professional. Furthermore, practice the essential step-back visual check. Finish each major body section, intentionally step back 3–5 meters, aggressively rotate your horse directly toward the bright natural sunlight, and closely evaluate the symmetry. Catching missed divots now is much better than discovering them in photographs days later. If during this deeply exhausting process your stressed horse is aggressively kicking, dangerously bolting, or has more than 10% of its body left unclipped after a full hour of constant battling, safely put the tools away and immediately call your trusted vet to discuss chemical sedation. Safety always surpasses pride.
Horse Clipping Schedule: How Often Should You Clip?
Perfect clinical timing matters significantly more than most eager beginners tend to expect. Getting the delicate biological timing utterly wrong either leaves your hard-working horse uncomfortably hot for weeks on end or entirely throws off their complex, natural spring coat shedding cycle. Start clipping in late September or early October. That specific window directly coincides with the exact moment the thick, unruly winter coat aggressively starts pushing through. From that precise starting point, your customized grooming schedule depends on one critical lifestyle factor: how incredibly hard your beloved horse is actively working in the arena or out on the hunt field.
A practical seasonal schedule looks like this: You perform your initial base clip, usually a trace or full depending on the intended winter workload, in late September. As the dark winter months furiously march on, you simply re-clip the rapidly regenerating hair every three to six weeks depending on the visual coat length, their sweat volume, and how long they stay damp. Your horse takes more than 30–40 minutes to dry after a workout? That coat needs to come off. You must definitively cease all major body clipping activities at some point between late January and early March. Clipping too deeply past the ides of March severely risks structurally damaging the incoming summer coat.
For highly competitive sport horses remaining in extensive, heavy physical work and intensely sweating four to five individual times a week under saddle, requiring full clips every 2–6 weeks is the absolute standard in the industry. For the more casual rider, doing one to two clips per winter season is generally more than enough. Maintaining this regimented schedule ensures your sport horse remains as perfectly regulated and structurally comfortable as an elite rider suited up in custom equestrian apparel engineered specifically for athletic winter performance.
Post-Clipping Care & Final Thoughts
The heavy motor finally goes blissfully quiet. The dusty barn miraculously settles back into peace. And your surprisingly smaller-looking horse is standing there completely naked, likely blinking at you while waiting for their dinner. This incredibly vulnerable post-clip period requires immediate intervention. Because a beautifully clipped horse rapidly drops its internal body heat, particularly when barn temperatures dip below freezing, you absolutely must rug them up immediately. Horses bearing a fresh full clip instantly require a heavy 300g+ fill thermal blanket right away, while those sporting conservative trace or blanket clips can comfortably get by with significantly lighter turnouts for the evening. Ensuring they are covered is paramount; just as top equestrian suppliers rigorously weather-test their winter rider coats, you must ensure your horse's winter wardrobe holds up to the chilling draft.
Before you finally pack away your expensive grooming kit, gently take a warm, damp towel and meticulously wipe down their freshly clipped skin. This soothing action swiftly lifts away nasty loose hairs and actively calms any minor skin sensitivity caused by the dragging metal. Run your bare hand smoothly across the shaved skin to diligently check for hidden nicks or localized redness. After tending to the horse, show that same respect to your tools by aggressively brushing the hair out of the mechanisms and applying a heavy coat of storage oil so rust does not destroy your sizable investment. Finding the right tools for grooming is much like a growing tack brand finding the perfect partners offering premium OEM/ODM services to manufacture their wholesale equestrian clothing—consistency and proper maintenance always guarantee the best long-term results.
Ultimately, body clipping looks remarkably intimidating right up until the exact moment it simply doesn't anymore. By securing exactly the right robust blades, insisting on a spotlessly clean animal, and utilizing a conservative clipping pattern that genuinely fits their actual workload, the entire terrifying process seamlessly falls into place. You certainly do not need to be a highly paid professional groomer to successfully give your horse a highly functional, comfortably clean clip. All it truthfully takes is rigorous preparation, abundant patience, and the brave confidence to execute that very first pass across the shoulder. So gather your grooming kit, pull on your favorite custom equestrian outfit to keep the winter chill off your own back, and confidently schedule your very first session. You have absolutely got this.